
Eloqua Segmentation Options
Filter Criteria
The Filter Criteria option allows you to build a dynamic filter (meaning that it automatically refreshes data) using a variety of criteria types. It can be a bit more work up front, but once it's set up, nothing else is required in order to see changes reflected.
How does this work? The data in Eloqua is synced from VIP (UT Austin's database) on a nightly basis. When there are changes on the VIP side, the nightly sync sends this data to Eloqua. As a result - when the filter in your segment refreshes, it shows you the latest data, as it appears in VIP.
An example:
You have a filter that's pulling all of your CSU's alumni. May arrives, which means that many of your students are graduating, and will soon become your newest group of alums. As soon as these students have their graduate status added to VIP (which is usually around a month after graduation), this information is reflected in your segment, without any direct interaction from you.
If you'd like to create a filter and you're not sure where to start, browse through some of the examples under Segmentation on the Eloqua Help page, or contact us for assistance.
NOTE: To use the Filter Criteria option, your contacts must all exist in VIP (which means that they are affiliated with UT Austin in some manner - alumni, donor, faculty/staff).
Individual Contacts
You may find that you have a few contacts you want to include in a segment, but they don't match the criteria for your existing filters. For example, your dean may want to be included in your segment, but doesn't get pulled into an alumni filter that you're using in your segment. The Individual Contacts option offers a way to specify particular individuals (like the dean in the above example), and ensure that they're included in your segment.
To add an individual contact, click on the inner + button (not the one right next to the contact total), then search by email address in the top right text field. Highlight your contact and click the Add Contacts button at the bottom right.
NOTE: To use this option, the contact you wish to include must currently exist in Eloqua.
If you have a need to reach external contacts who are not associated with UT Austin (and in turn, don't exist in VIP), then you'll want to use the Upload Contacts option.
NOTE: If you are new to uploading contacts, or if significant time has passed between now and your Eloqua training, please read all of the content below, as there are several important details to know regarding this option.
1) Preparing your File
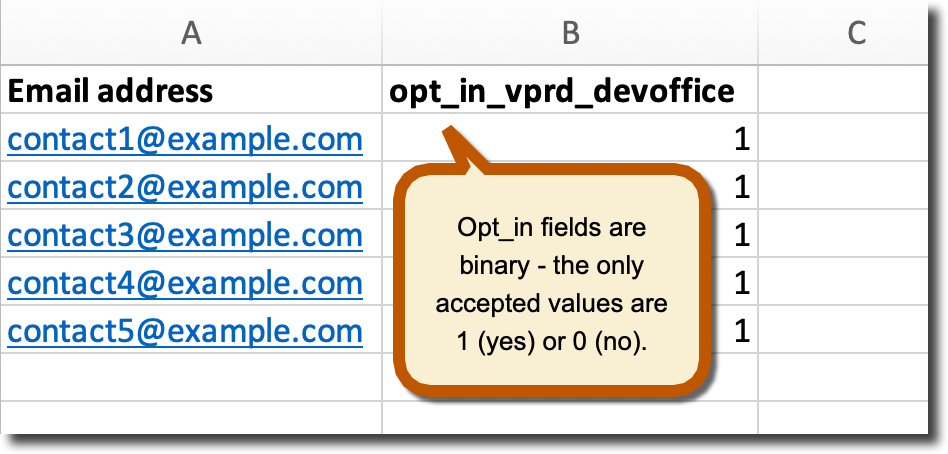
Your file must include at least the following two columns: Email Address, and an opt_in column.
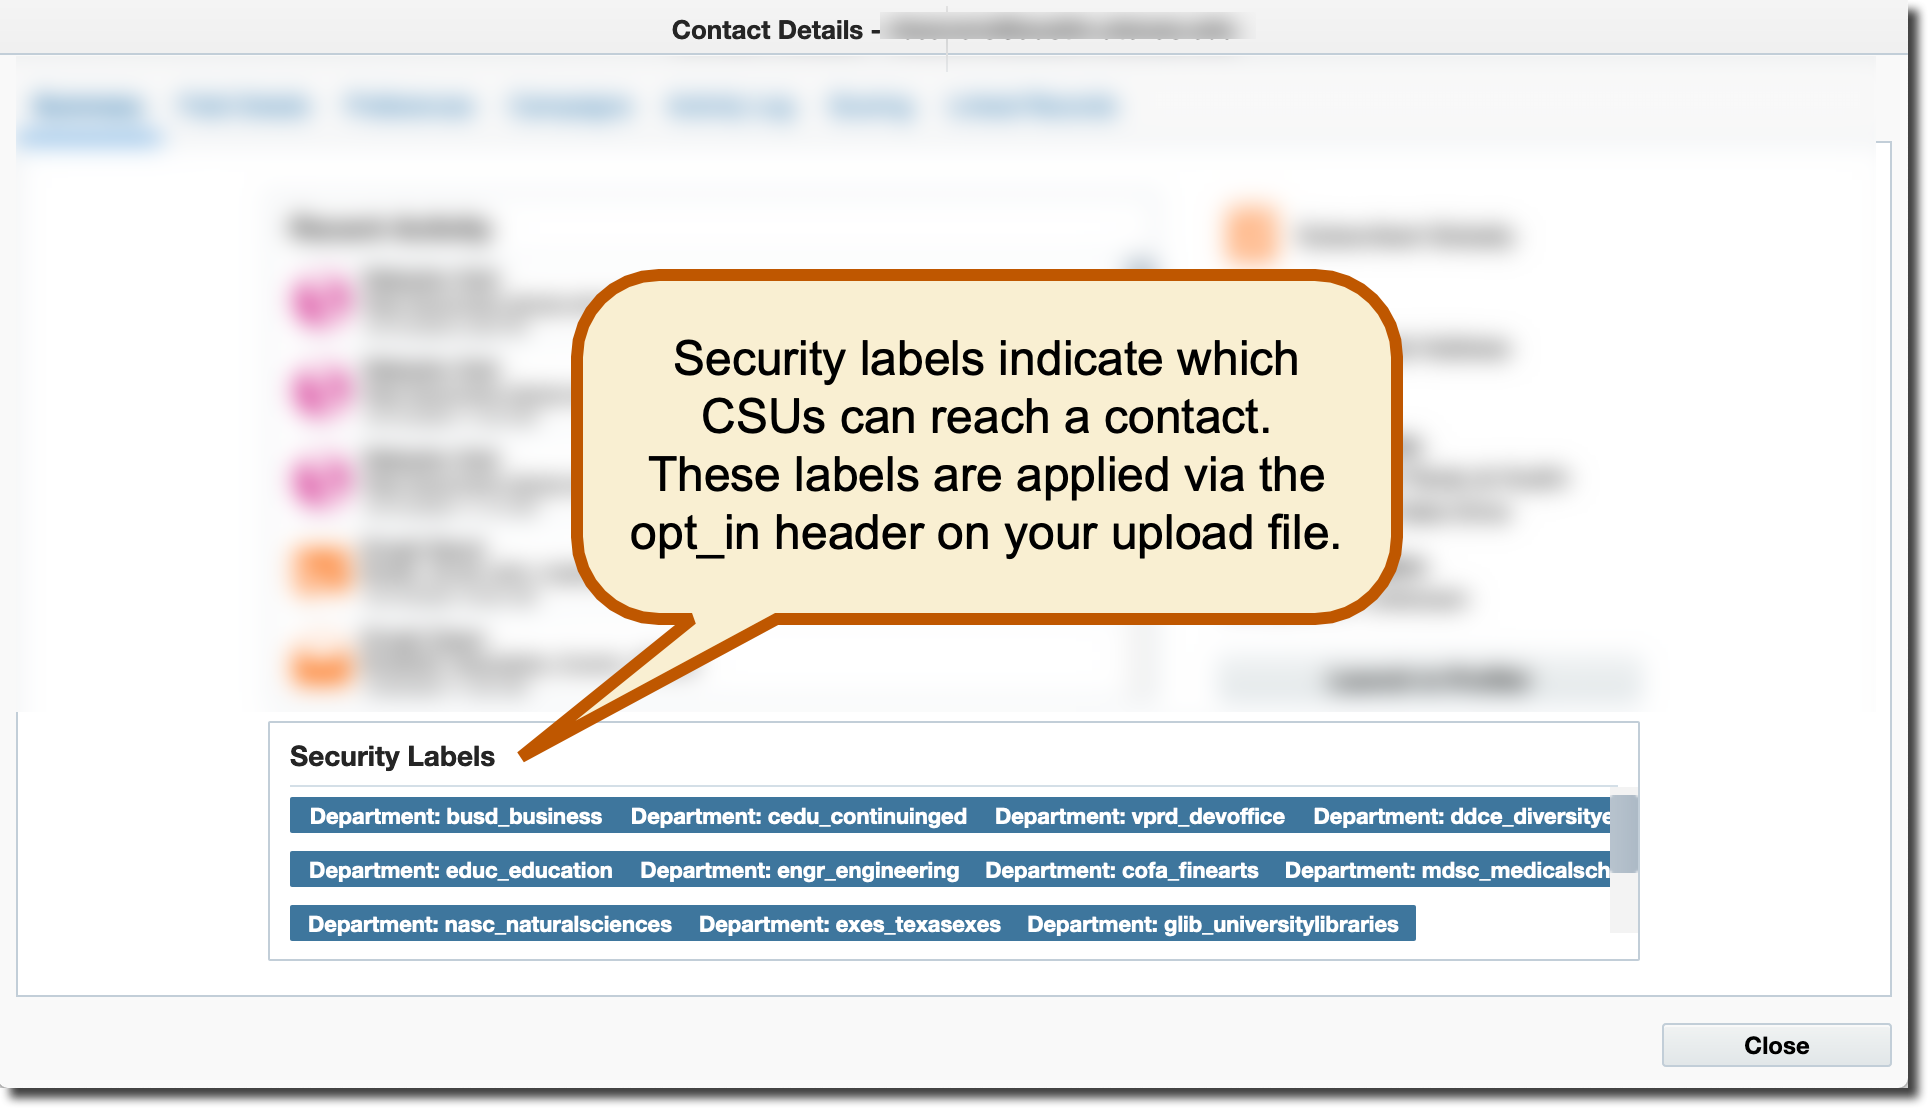
The reason that we include the opt_in column is because at UT Austin, we all share the same instance of Eloqua. As a result, we can't simply upload a file and expect Eloqua to know to which CSU each contact belongs. Instead, we must instruct the system how to flag each contact that we're uploading. We do this through the use of the opt_in column header, which is used to apply what is called a security label to your contacts' records.
NOTE: A complete list of opt_in column headers, as well as an image of an example file at the bottom of the page, can be found here: https://ut.econnect.utexas.edu/opt_in_column_headers
Your CSU's opt_in header must be copied and pasted (or typed, if you happen to have it memorized) exactly as it's found on the linked page above - with all text separated by underscores - or the field will not map automatically.
Also, for every email address on your file, there must be a number 1 in the opt_in column (which translates to 'yes') to indicate that the contact should be included in your CSU's contact pool.
We have a Security Label Program running behind the scenes, which reads these opt_in column headers upon upload, and applies the appropriate security labels to each contact. This program sifts each uploaded contact through a series of steps to determine where each belongs (which can be multiple CSUs).
This process takes a bit of time. Each one of these security label steps re-evaluates every few minutes, and there are currently forty-five steps in the program. Additionally, other users could possibly be uploading contacts at the same time as - or just before - your own file. These other files could potentially contain large amounts of contacts. In such a case, you have no choice but to wait in line.
Because of the required processing time, we recommend that users allow at least two hours before expecting to see their contacts. If feasible (we understand this isn't always the case), we suggest uploading at least a day ahead of your email delivery date, in the rare case that you get stuck in a contact traffic jam, as described above.
2) Uploading Your File
Selecting the Upload Contacts option opens the Contact Upload Wizard.
Step 1 - Pick Data Source. This step prompts you to name your upload and browse for a file. We highly recommend that you name your upload, instead of leaving it as the default, which is 'Data Import - [random numbers]'. Giving your upload file a meaningful name makes it easier for you (or us, if support is needed) to find it later.
Step 2 - Review. After clicking the cloud icon and choosing your file, you’ll be shown a preview of your data.
Step 3 - Map Fields. This step requires attention to detail, as it will look at the column headers on your file and review how they’re mapped to contact fields in Eloqua. Important notes:
- Do not change the 'Uniquely Match Contacts on Email Address' dropdown. Email address is the unique identifier within our Eloqua instance, and there is absolutely no need to touch this.
- Leave Case-Sensitive Match unchecked.
- Source Field is what you've named your column headers on your file. Target Field is where Eloqua will place this data. If you see a row that says 'No Matches', you MUST correct this before proceeding. If Eloqua doesn't recognize your column header as matching one of its field names, it may take a best guess as to where your data belongs. Do not let this happen. To correct a situation in which you have no matches, double-click on the row in question, and find the correct field in the Target Field dropdown menu. There's no need to make a change to the Update Type field. Click anywhere outside the window to close it, review to make sure that your fields are mapped correctly, and click Next Step.
Step 4 - Finish. You'll see a field that says 'Send Upload Notification To: [your email address]'. Once you click the Finish button, Eloqua will send out a near-immediate notification that says your contacts have been uploaded.
Please ignore this notification. Eloqua does not factor in the additional processing time required by our security label program. While it's true that your contacts are in the system, they still have to process through all the security label steps, which takes some time (as described above).